Step-by-Step Tutorial of Screen Printing
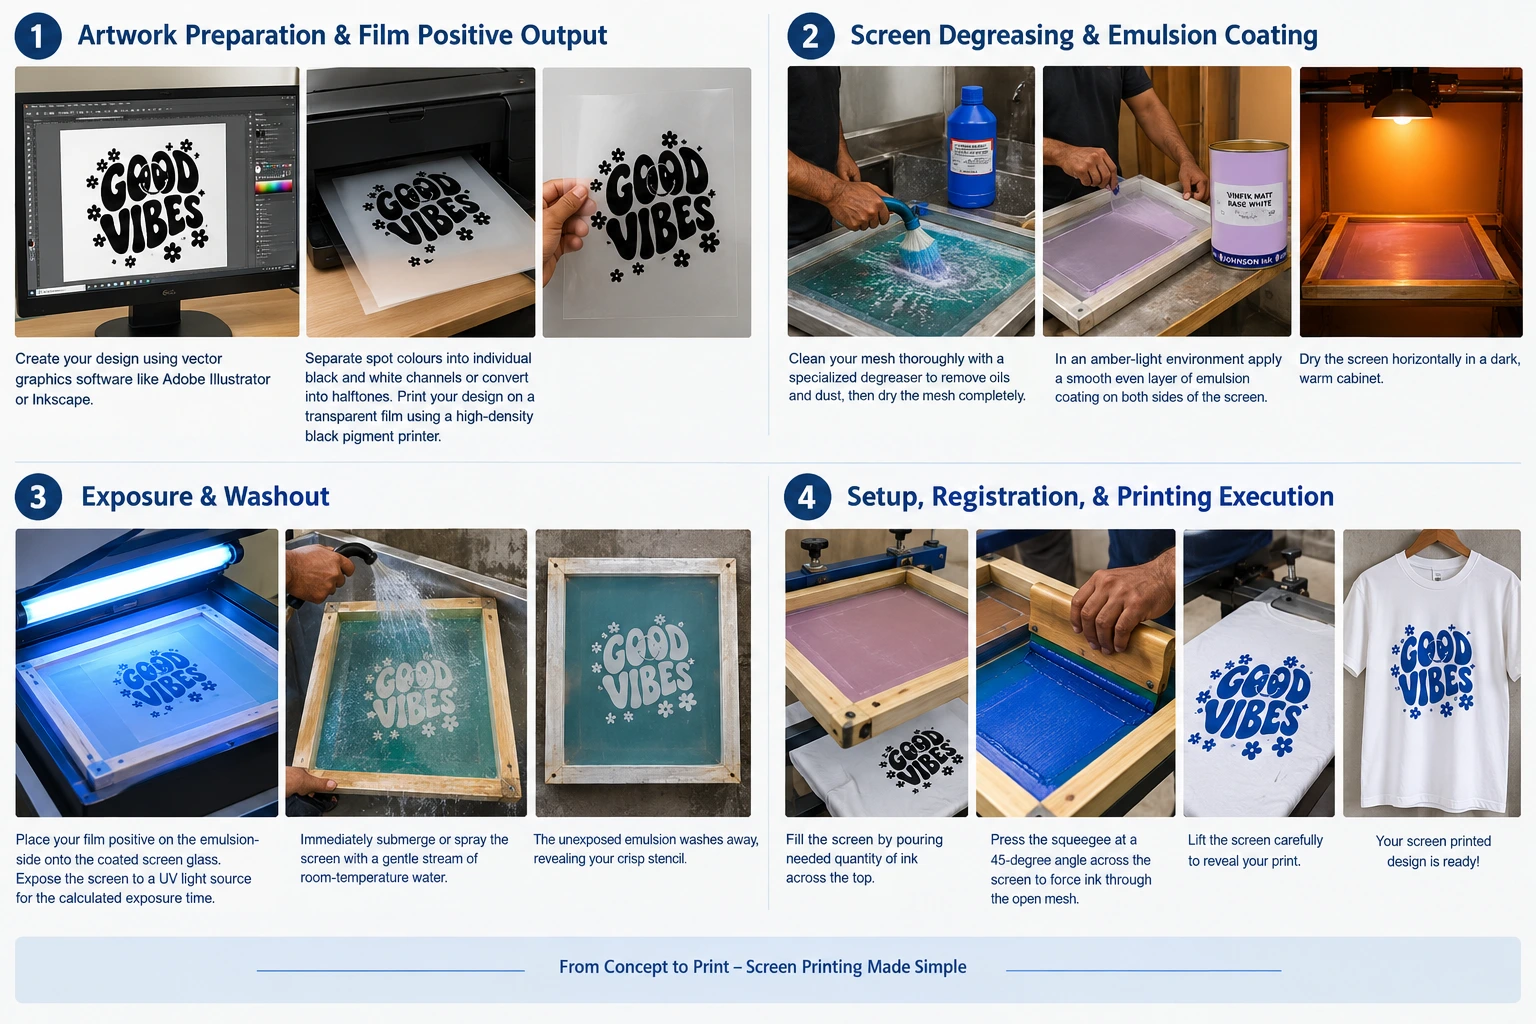
1 Artwork Preparation & Film Positive Output
Create your design using vector graphics software like Adobe Illustrator or Inkscape. Next separate spot colours into individual black and white channels or convert into halftones. Print your design on a transparent film using a high-density black pigment printer.
2 Screen Degreasing & Emulsion Coating
Clean your mesh thoroughly with a specialized degreaser to remove oils and dust, then dry the mesh completely. In an amber-light environment apply a smooth even layer of emulsion coating on both sides of the screen. Dry the screen horizontally in a dark, warm cabinet.
3 Exposure & Washout
Place your film positive on the emulsion-side onto the coated screen glass. Expose the screen to a UV light source for the calculated exposure time. Immediately submerge or spray the screen with a gentle stream of room-temperature water. The unexposed emulsion washes away, revealing your crisp stencil.
4 Setup, Registration, & Printing Execution
Fill the screen by pouring needed quantity of ink across the. Press the squeegee at a 45-degree angle across the screen to force ink through the open mesh onto your substrate.